
I often refrigerate my loaves after shaping, letting them finish up their final proof in the fridge overnight, for example, so that they’re ready to bake first thing in the morning, or whenever. This has proven to be a wonderful technique for controlling my baking schedule so I can fit a few other activities in (you know, little things like work and sleep).
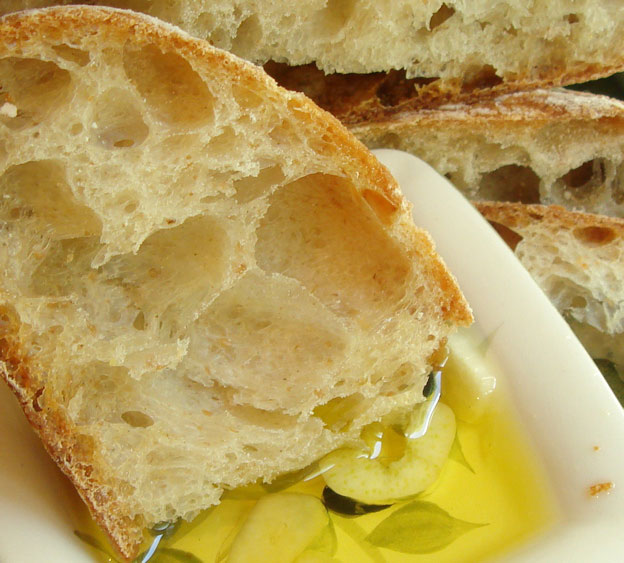
If I have more than a couple of loaves, though, that can take up rather a lot of space in the refrigerator. When someone on The Fresh Loaf recently brought up the subject of retarding (refrigerating) the dough during its initial fermentation to save on fridge space, I realized that was a pretty good idea, which I had not considered before, especially for breads that proof in a space-greedy couche (thanks, beenjamming!). Then in my recent class at SFBI, retarding was covered in some depth and it was confirmed that, yes, bulk retarding is a very fine strategy. One of the breads we made to illustrate this was a ciabatta, which recipe I have adapted here by substituting a little whole wheat flour and increasing the water to satisfy that thirsty flour.
This bread does take two days to make, but the hands-on time is really quite minimal, and the retarding step offers some flexibility in timing that you don’t get with non-retarded doughs. And while you can’t exactly bake it first thing in the morning, because it does need time for the final proof after you take it out of the refrigerator, it’s still great if you want to be able to bake fairly early in the day (well in time for lunch). I made six loaves, and since only three can fit in my oven at once, I put the second three back in cold storage for a while after dividing, with still very good results.
The key to success with this ciabatta is to develop the gluten before adding all of the water. Ciabatta is a highly hydrated dough, and adding all the water in the beginning would make it difficult to develop the gluten sufficiently. By holding back about 20% of the water initially, and adding it only after the gluten has been developed to a moderate degree, a strong but soft dough can be achieved. Strength is further added by folding the dough a couple of times during the initial stage of bulk fermentation.

Overnight Ciabatta
Yield: 3 kg (six loaves)
Time:
- Mix and ferment poolish: 6 hours
- Mix final dough: 10 – 15 minutes
- First fermentation (in the refrigerator): 12 – 15 hours, with folding at the first 45 and 90 minutes
- Warm-up: 1 hour
- Divide: 5 minutes
- Proof: 1.5 – 3 hours
- Bake: 35 – 40 minutes
Poolish Ingredients:
- 457 g white flour (I used Giusto’s Golden Haven organic)
- 152 g whole wheat flour (bulk from Whole Foods)
- 609 g water at about 65F
- 2 g instant yeast (2/3 t.)
Final Dough Ingredients:
- 1082 g white flour
- 710 g cold water (about 40F)
- All of the poolish
- 34 g salt
- 3 g instant yeast (1 t.)
- 51 g olive oil (Note: I omitted this when I originally posted the recipe. Sorry!)
Method:
- In a large bowl, mix all the poolish ingredients until just combined. Cover the bowl and let the poolish ferment at room temperature for about 6 hours. The poolish is ready to use when the surface is creased, and pebbled with bubbles.
- Place all of the final dough ingredients, except about 20% of the water, into the bowl of a stand mixer. Mix on low speed until the ingredients are incorporated, about 4 or 5 minutes.
- Continue mixing on low or medium speed until the dough reaches a medium level of gluten development. This might take about 5 minutes, but will depend on your mixer.
- Add the remaining water and continue mixing until it is all incorporated and you have a dough that feels very soft but strong and springy.
- Transfer the dough to an oiled container.
- Check the temperature of the dough. If it is around 72F, leave it out at room temperature until after the second fold, but if it is warmer (mine was 80F), put it in the refrigerator right away, taking it out only to fold.
- Fold the dough at 45 and 90 minutes. Make sure the container is very well oiled after the second fold so the dough will not stick when it is turned out onto the counter later.
- After the second fold, refrigerate the dough for 10 – 14 hours.
- Take the dough out of the refrigerator and let it warm up for about one hour.
- Turn the dough out onto a very well floured counter (you really can’t get too much flour here; you want to make sure the dough doesn’t stick, and any excess will just be left behind on the counter).
- Working from the center towards the edges, very gently stretch the dough into a rectangle about 2 cm in height. Try to degas the dough as little as possible.
- With a dough scraper, cut the dough into six rectangles (3 x 2). Gently lift these pieces to a liberally-floured couche, supporting the entire piece from underneath with your flat hands, keeping the floured side of the dough down. Again, be very careful to degas as little as possible.
- Cover the couche with plastic or slip it, on a board or sheet pan, into a large food-grade plastic bag.
- Proof for 1.5 – 2 hours at room temperature, until the dough is very light and full of gas. Alternatively, place the loaves in the refrigerator for 2 hours, then another hour at room temperature.
- Meanwhile, preheat the oven, with baking stone, to 475F. You will also need steam during the initial phase of baking, so prepare for this now.
- Prepare a piece of parchment paper the size of your baking stone, and put it on a board or sheet pan.
- To transfer the loaves from the couche to the parchment, lightly sprinkle them with flour. Holding the edge of the parchment-covered pan right next to the edge of a loaf, grab the end of the couche, pull it taut and use it to flip the loaf over onto the parchment, so the heavily floured side is now up. Do this maneuver as gently as possible.
- To bake, slide the entire loaf-laden parchment onto the baking stone.
- Once the loaves are in the oven, turn the heat down to 450F. Bake for 8 minutes with steam, and another 20 minutes or so without steam. The crust should be a deepish golden brown. Once the crust is the color you want it, turn off the oven and leave the loaves in, with the door cracked open, for another 10 -12 minutes.
- Cool on a wire rack. Wait until completely cool to cut and eat.


Wow the ciabatta looks delicious!
Yes I’m from Sweden. I don’t blogg on english (really bad speller 🙂 )
I made the Norwich Sourdough this weekend. It doesn’t look like yours at all. Can’t really explain, but it didn’t raise so high.. The inside was very compact (is that the right word??) And it was a bit like rubber..
What does “360 g ripe 100% hydration sourdough starter” meen? Is it dry? My sourdough is like thick liquide.
I have pictures of the bread on my page.
I’m so happy I found your page!
Really wonderful. I’ll try it soon.
try this 250 starter 175 bread flour 50 gm rye, 25 gm spelt flour 147 water bottelrd, 15 gm olive oil 38 gm soy milk 1 teaspoon of malt extract. mix dough until it reaches 28 c rest for 40 minutes stretch and fold twice cut into two and shape let proof for 2 hours and then bake use plenty of steam.
sorry I forgot 9 gm yeast so it not 100% sourdough but it works great.
ciabatta that works.
250 gm sourdough starter 175 gm bread flour,50 gm rye flour, 25 gm spelt flour,147 warm water, 38 gm warm soy milk 8 gm salt,8 gm olive oil, 5 gm yeast.tsp malt extract. mix until it is 28 c put into square container 1. 5 hours stretch and fold 4 times in the container it must be well oiled.leave for another 1.5 hours do not use flour just oil. carefully turn out onto a lightly floured surface try not to degas, cut into 2, final proof 1 hour .bake with heaps of steam and the results are great. just use baking paper prop up sides as this is a very wet dough.on a baking stone is best.
Beautiful! I’m off to the kitchen. =) Thanks for the lovely recipe.
Fru B, hej då! I think your bread is beautiful. A 100% hydration starter is one that is fed with equal parts of flour and water, by weight. If yours is a thick liquid it’s probably 100% or close to it.
Marta, I hope you do!
Karen, you’re welcome. I hope your kitchen is cooler than last time I heard from you!
They took my breath away. Wow, Susan, you sure know how to bake a loaf of bread! Astonishing looks and quality of crust and crumb. Congratulations!
Beautiful Susan! I can’t wait to try this recipe!!! So far I don’t have much luck with ciabatta but I think your tip about forming the gluten first then adding the remaining water will help. I also think I will try this technique for my high hydration doughs!!
Mariana, thanks!
BZ, I’ll be interested to know if you have success with the technique.
I just discovered your blog – how nice to meet another person with a passion for bread 🙂 Thanks a lot for sharing your knowledge!
These ciabatta’s are so beautiful, I am hoping to try them myself!
Cascabel, I’m so glad to meet you too.
Jamila, hello, thank you, and I hope you enjoy the ciabatta if you make it!
ok. Now you have me thinking. I have made a total of three batches of (ciabatta) bread so far, I am a newbie. My bread is getting better. This last batch had bigger holes, for me. But not quite ciabatta bread holes. I am baking at 7000 feet above sea level. Do you know anything about this? Next batch I am going to try it your way.
I am going to read and reread this post. I may write to ask you more questions, if that is OK.
I could just dive in the cratters! Gorgeous breads. I have been reading your blog for the past hour and I can’t believe I have just found about it. I make a lot of bread too (every other day) but rarely blog about it, I am more the sugarfreak blogger!
Keep up the good work!
Melly, sorry I can’t give you any hints about high-altitude baking; I do all of mine here at near sea-level. You may want to ask that at The Fresh Loaf as I’m pretty sure there are people there who can give you some advice about it. Good luck with the ciabatta!
Tartelette, thanks, and I’d love to see some of your breads on your blog. Your sugared creations are very beautiful.
Hi, your breads are awesome. I will for sure try some this weekend. I have high gluten flour and also another flour similar to the French for baguettes. Which would be closest to the flour that you use? Thanks.
Thanks.
Nhumi
Thank you susan, your ciabatta recipe worked really well, my housemates finished all of them in one setting. Thank you so much.
Nhumi, the flour I use has about 11 – 11.5% protein, so it would be closer to your baguette flour than a high-gluten flour.
Kim, thanks for letting me know how this worked out. I’m glad you liked it!
I have to make this recipe! We love ciabatta. The texture looks absolutely perfect!
Barbara, I’ll look forward to hearing how the recipe works for you!
Every time I try to make ciabatta I fail. It never comes out quite right. I have tried other recipes, but this one was more promising. However, i still had feeble bread. The dough consistency seemed right, but the baking part didn’t work out. Unfortunately, I do not own a couche yet. I used a Baggett pan for two loaves and a cookie sheet for another. I still had enough dough for at least 3 other loaves. The dough on the sheet ended up really flat and didn’t have the grand taste of ciabatta. The other loaves were ok, but they started falling over the sides of the pan. For some reason, lately, when I am baking the bread my dough falls and my bread has a flat top to it. It doesn’t come out rounded. It might be that the dough is too warm while it is proofing? My crust was OK, but I didn’t bake it long enough. I had to leave the house. When mixing this kind of dough, do you use a hook or paddle? Do you have any thoughts?
Daniel, it sounds as though on ething that may be happening is that your loaves are overproofing. What is the temperature of your dough and your room? If these are too warm the dough will proof faster than the times I give in the recipes. Bread falling rather than rising in the oven is almost always a sign of overproofing.
A couche can be improvised with a smooth cotton towel or some linen fabric. If the fabric does not have enough body to stand up in pleats on its own you can use objects such as books or cartons of foil, plastic wrap, etc., to bolster it on the ends.
Keep at it! Even if you don’t know for sure what’s going wrong, just practicing anyway will help. Good luck!
I kind of figured it would be over proofing. Thank you so much for your response!
Great looking bread! Could this recipe be converted to use a sourdough starter?
Herb, there are many recipes floating around for “sourdough ciabatta” although my understanding is that with sourdough it’s technically not “ciabatta” anymore but more like “pane francese.” The recipe for Rustic Bread in Nancy Silverton’s La Brea Breads book is one I have used and like.
impressive! heavenly ciabatta!
IDY, thanks and welcome!
Hi Susan, I just found your blog yesterday and I am hooked! I have a question, how do you get your crumb to be so shiny? My breads always come out dull looking.
Susan — What type of mixer did you use for this ciabatta. It is a thing of beauty and probably only a joy for about 1/2 day…assuming it gets eaten that rapidly!
Norma, I used my SP5 (countertop spiral) mixer. Yes, it does get eaten quickly but if not eaten dries out quickly too. Once it stales, though, it can be sliced thinly and toasted in the oven for crostini.
Jami, the short answer to your question is practice! The long answer is… well, I can’t point to a single thing that makes for the kind crumb you’re looking for. Honestly, I think it’s all important: flour, hydration, proper gluten development, proper fermentation time, etc. I wish I could be more helpful but I’m just muddling my way through these questions myself!
Hy,
I’ve seen Your ciabattas: are very very beautiful!
Bye!
Daniela
Thank you for such a beautifully presented recipe! It’s such a motivation to see your lovely photos.
I have question- is the flour “all-purpose flour” or “bread flour”? Since one of the key factors of this recipe seems to be about giving the gluten a chance, and since the difference between these two flours is gluten content (I think), I thought I’d better ask you!
Thanks
Teresa, I was wondering when someone was going to ask me this question! I’ll do a post about flour soon, but here’s a short answer — if you can, use flour made from hard winter wheat that has about 11 – 11.5% protein. Most “bread flours” have more protein than this, most AP flours less, and/or are not all hard winter wheat. Gold Medal Harvest King is one national brand that fills the bill.
Hello Teresa,
Nice website and well done on the bread. May I ask if you know if the addition of olive oil should be at the start or later (after autolyse) in the mixing of this ciabatta. I have not made it regularly enough to tell. I was thinking, autolyse first, then add poolish & mix a bit, then add salt & oil and mix more. My thinking was that the ferment may be inhibited by the oil initially.
Cheers,
Hasan
Sorry its Susan not Teresa
Bit brain dead today
Hasan, I don’t use an autolyse for this dough — not necessary as autolyse makes the dough more extensible but the dough here is quite extensible already due to the high hydration. The olive oil is added at the beginning along with the rest of the final dough ingredients (except some of the water).
That’s it, this is my next project. I have been wanting to try a ciabatta for some time. But Susan’s loaf is so incredibly rich looking that … how can I not? 🙂
Oh, and my site is now going to be modeled after hers –
As the old saying goes: “Imitation is the sincerest form of flattery” (From Bartleby.com: To imitate someone is to pay the person a genuine compliment—…)
Thanks Susan, you’re such an inspiration.
-joe
I know this recipe has been posted for a while but I just found your site and I am new to baking bread. When I make this recipe and use my scale to measure the ingredients it always seems soupy after adding the last 20 percent of the water. Is it suppose to? And I have made several different recipes for Ciabatta and I have yet to get the nice big airy holes that others are getting including what I see in the picture on this site. I live in Virginia so I am wondering if climate (humidity)? may be working against me. Please kindly shed some light because I am in the dark on this one and it is driving me crazy.
Wishing you the best.
Jeb
Jeb, if the gluten is well developed prior to adding the last of the water, the dough in the end should be very soft but have a lot of elasticity to it. The water amounts in my recipes are always approximations, so you may need more or less than what is called for, depending on how thirsty your flour is.
Susan, I am trying to make Salt Rising Bread and old family recipe. After years of success I am striking out. I cannot get the yeast to rise. My recipe calls for a cup of scalded milk and enough white meal to make a almost drop batter. That is to rise. That is of course what attrcts and uses the wild yeast. Now I am using organic meal that is still jerminated and my milk is regular pasturised milk. At what temperture should I keep the mush for it to work? My Grandmother made it keeping the mush warm on a wood stove overnight. my mother made it using a “pilot light”. I have made it for years keeping it warm in my utility room which is free of air conditioning. As James Beard stated in his Bread Book, “If it doesn’t work do not take it personally” He called it the Prima Donna of breads. I guess my question is how warm should I keep the mush for it to rise in 13-15 hours?
frances, unfortunately I have no experience with salt rising bread, although I believe James Beard advises keeping the starter at 100F. Your grandmother’s method sounds good 🙂 I wish you good luck!
I loved the look of your crumb and decided to try your recipe as this is my goal in my bread baking life. LOL I followed all the measurements on my scale, something i NEVER do. Well, anyway it all worked well except i did an autolyse to the remaining flour and water, wich didn’t want to incorporate very well. I ended up with a gooey lumpy mess. My mother said in her usual humor, “looks like your gravy has lumps”. Not to be defeated as I am a chef (not a baker) I turned the “blob” onto my counter and with my dough cutter managed to knead in enough flour to be able to pick it up and sling it into my fermenting container. Yada yada yada let it sit in the fridge overnight and made ciabatta (sandwich size) ciabatta, and one bastardized batard. They came out wonderful!! Beautiful crust and crumb. DOnt have a clue how to submit photos, but have some. So thank you for the recipe ( i’ll double check the recipe the next time, but will use it again. Thanks and Happy Baking
Happy29 aka Stephen
Gorgeous nooks and crannies in that crumb! I’ve been experimenting with wet dough and overnight fermenting and I love the quality of the crust I’m getting. It’s amazing and by the looks of your gorgeous ciabatta, I know it must be true! I know this is an old post, but I hadn’t seen it before…
the ciabatta looks amazing. i made it this morning but i think i messed up when putting it in the couche – it got a bit degassed – the flavor is great but the holes just arent there. what do you do if you don’t get parchment paper? denser ciabatta, i guess 🙂
My wife loves ciabatta and I have tried several times with different methods and recipes and so far she seems to like yours the best. Could this also be considered the “double hydration” method I heard discussed once?
Anyway thanks for your wonderful site.
Susan,
I found your blog by chance, searching for proofing baskets. I am experimenting with no-kneading bread, just a rustic, easy, no work (ha!) crusty bread and have yet to call one “the best”. Have you tried baking bread in wood burning oven? I have one, but I have only used it for pizza and making bread from leftover pizza dough. I’d like to move to the next level, do you have any tips?
Thank you for your great blog!
Great site Susan lots of good info like the video on geting the baguettes on to the tray.
Will have a go at this bread using my starter no yeast.
Best wishes
regards Normbake
Queensland
Australia
Hello Susan,
I’ve been looking at several different “ciabatta” recipes, and watching videos. Why does this bread always involve a flip into it’s final position for baking… I mean, what’s wrong with shaping it and keeping it the same side up? Maybe I’m missing something…
Oh my goodness, I finished up these loaves this evening and they were a thing of beauty. I had to improvise a couche and should have used my seasoned rolling towel or used twice as much flour on the new one because they stuck a bit when I flipped them. Fortunately it didn’t seem to harm the air pockets. The bread came out super light and full of beautiful gigantic holes. It was light, tender, shiny and chewy inside with a thin crispy chewy crust. Thanks so much for providing this technique Susan! I do believe this is the best bread I have ever produced.
Pietro,
It is much easier to flip the bread onto another surface without degassing it than to pick it up from the bottom; this is why the bread is flipped, to maintain the fermentation gas. I don’t have a peel or a couche, so I proof on my (clean!) counter, then use a metal dough scraper to pick up the one side and place it on one hand, pick up the other side with the blade, and carry it to the stone (the thin metal means that it slides under the dough easily).
Susan, lovely bread. Have you tried to use the slap and fold method to develop the gluten on this bread? I find it works great on high-hydration doughs. The reason I ask is that I’ve found from experience that additional water incorporates into a dough quite reluctantly, the result being the “lumpy gravy” that Stephen describes. I suppose it is not too much of an issue when you have a mixer.
Dear Susan:
I was reading a book called “How baking works”, where the author explains that in order to have large holes one should try not to develop the gluten too much, since the idea is that small holes break apart and join together to form large holes. When gluten is well developed, then small holes never break up. What do you think about this? I´ve tried many times to make real ciabatta, but have never been able to achive success.
Juan Fernando, in general that’s true, you don’t want the gluten to be completely developed if you want an open, irregular texture. The large hole structure on ciabatta comes from the high amount of water in the dough. The water weakens the dough, even when the gluten is fairly well developed, so, as you describe, smaller “cells” break apart to form larger ones. Also, during baking the water creates a large amount of steam, which expands the cells.
Susan—you mentioned that you have a SP5 spiral mixer. I just purchased one, after my KA died! I have only used it once using my ciabatta recipe……it never developed into a dough, so I ended up scooping it out with a measuring cup—what a mess!!!!!!!!!!!!!!!!! Could you please share with me your knowledge of using this machine and cleaning it afterward………
Thanks so much—Grace
Wonderful explanation and instructions which I will apply to my handmixed method….but 2 cm really? I end up with easily twice that with my 72% hydration all bread flour handmixed dough.
Love the site.
Thanks.
Can I use started instead of Poolish. Any changes to final dough. I have a whole wheat starter.
Thanks
It looks yummy. I’ll try your recipe some day. It is a typ of my favorite bread.
Thank you for shared us the wonderful recipe.
hello im new at this ..what is a poolish??
Hi. The ciabatta looks beatiful… am really into my wild yeast starter right now. Is it possible to make this bread while omitting the baker’s yeast?
Lola: a poolish is a type of yeasted “starter” that usually has a liquid consistency due to the high amount of water in it. If you follow the recipe here, you will have made one!
David: http://www.wildyeastblog.com/2008/07/28/sourdough-ciabatta-rolls/
Hi Susan,
I also have an SP5 spiral mixer. In the past, I have had a really hard time with high hydrations doughs. Is the mixing regimen in your formula specifically for the SP5? If not, could you kindly advise as to your current regimen. Also, when incorporating the remaining water; approximately how long does it take you to add it all & how long after that does it take the dough to come together as one mass.
Thanks,
Matthew
Matthew, I do use the SP5 for this dough but I tried to make the instructions sufficiently general to apply to any mixer. That is, mix “until ready.” 🙂 This depends not only on the mixer but on the flour you are using. I add the remaining water all at once, and it might take several minutes to incorporate.
Thanks Susan. I’ll give it a shot & see how it goes.
Matthew
Hi Susan,
I have just found your blog. Previously, I used Artisan Bread in 5 minutes by Zoe but I decided to try a traditional way of making bread. The only problem is my dough never turn out elastic enough. I have followed your methods but I can’t even make a window pane using the dough. Do you have any guesses what are the problem?
And…they never made a big nice holes like yours in the photo. The crumbs was nice, but the holes…they are so small! Don’t know what I do wrong. Can you help me figure out the problem? I live in Malaysia, so the weather never drop below 24C.
They are lovely bread! Thank you.
Thank you for sharing your technique!
I love bread and I was getting really hungry while reading your post. The ciabatta pictures look great.
This recipe is amazing. I reduced the measurements by half and the recipe made 7 foccasia crusts! After baking 3, I refrigerated the crust in a ziplock bag for later use. I just forwarded this link to a friend in Spain who wants to duplicate a pizza I made for her family while visiting Castellon 15 years ago. She will be blown away when she tastes this crust comparing it to the one I made-up! Muchas gracias!
RE THE OVERNIGHT CIBATTA —
WHEN YOU SAY CUT INTO SIX PIECES(3×2) THIS HAS NO DIMENSIONS DO YOU MEAN THE LENGTH IS 1.5 TIMES THE WIDTH OR DO YOU MEAN 3′ X 2″ WHICH DOES NOT SEEM TO WORK WHIT THE AMOUNT OF DOUGH — HELP — I HOPE YOU STILL CHECK THIS FOR LATE COMMENTS — THE BREAD LOOKS WONDERFUL AND I HOPE TO TRY IT — IF I DO NOT HEAR FROM YOU I WILL EXPERIMENT — THANKS FOR YOUR HELP —
TONYK
I DID NOT DO MY DIMENSIONS VERY WELL — I MEANT 3″x2″ WHICH DOES NOT FIT WELL WITH THE AMOUNT OF DOUGH — SORRY ABOUT THE MIX UP IT IS LATE AND I AM SLEEPY — THANKS —
TONYK
TonyK, what I meant was this: cut the large rectangle of dough in half in one dimension, and in thirds in the other dimension, so you end up with six pieces (two rows of three pieces each). Happy baking!
I need to know whether the olive oil goes into the dough or is it for dipping after the bread is baked..
Thank you
I’ve just made this ciabatta with great success! I used a cup of my sourdough culture added to the Poolish and no other yeast at all. Absolutely yummy!
Hi Susan, I am from Singapore. Everytime I try to make ciabatta, I fail, I have tried other recipes. Last night I tried yours, I made few BIG Mistake as follow:
1.Due to I need to leave the house my poolish ferment at room temperature to 6 hrs and refrigerate for 4 hrs, leave it out at room temp before use.
2.when I make this recipe and add the last 20%of the water, it became very soupy, I don’t own a powerful mixer only 350 w, this is the problem right?
3. Due to I need to leave the house, 1st fold the dough at 2 hrs later, 2nd fold after another 90 min later.
3. BIG MISTAKE when take out the dough from refrigerate, leave it out at room temp. due to very sticky, I started to fold my dough.
I don’t own a couche, I use bread pan to bake. After final proof for another 3hrs at room temperature, start to bake for 8 min with steam and follow by without steam, don’t have baking stone, is it a must?
wait untill completely cool and cut, not Big airy holes like yours, only small small airy holes, like normal bread. sigh! It is driving me crazy… hightlight me which is the mistakes, I should not make.
Thank you for all your sharing…
Hello! :DD
I noticed that the poolish calls for whole wheat flour but unfortunately can’t get any. Can the ciabatta be made with all white flour instead? 🙂
Hi! Thanks for the overnight recipe. I am hoping to make it tonight and let it go in the fridge until tomorrow’s dinner…approximately 18 hours before I warm/proof. Is this too long? Thanks!
Hi,
I tried this recipe and had a problem when mixing the ingredients for the dough. Actually, the mixture was very liquid-like and did not resemble a dough. I could not get an elastic dough and the mixture could not be separated from the bowl in one piece. It was like a glue, and finally I added flour so I could handle it.
I appreciate if you can refer to the flour/water ratio and advice how to process the dough.
Thank You, Avi
Susan .. love the look of this recipe and am keen to try. I need to downscale this recipe quite a bit (using bakers % .. thanks for your excellent tutes), however am unsure whether I create a separate formula for the poolish and another for the dough? I am not a mathematical genius so have only a basic grasp of BPs.
Thanks for any advice.
Sondra
Sondra, just scale all of the ingredients, including those in the poolish, by the same amount. For example, to make half as much dough, cut every ingredient amount in half.
Fantastic beat ! I would like to apprentice while you amend your site, how can i subscribe for a blog website? The account aided me a applicable deal. I were tiny bit acquainted of this your broadcast provided vivid clear concept
I have been looking for a good chiabatta receipe for a long time. This one looks like is exactly what I have been looking for. One question however, is could you please convert the metric measurements to ounces,TBS,etc. for me. I can convert the dry ingredients but am havings trouble with the liquid ones. Thank you, Chuck
Here’s some help: http://www.wildyeastblog.com/2009/04/20/do-it-yourself-conversions/
Hello Susan.
Your web site is fantastic. I’m very happy to discover it. Every recipe I fond here worked so fine: all my breads were tastefull and funtastic like in your fotos. Ciabata. Norwich sourdough, 45% Rye, you name it. Once again you are funtastic and thanks again. 🙂
Hello
I am really in time crunch but we like ciabatta so much and needed every friday evening with wine. Pls. guide me how i can achive this –
Do you think following schedule will work ?
1. mix ingredients for poolish in morning around 6am on Thursday. keep it at room temp. same day in the evening @ 7pm make bread dough using poolish.
3. rest it for an hour and stretch ( i can do this 3 time @ 1 hr. rest time)
4. after 3rd stretch put it in a refrigerator (so, it will be around 10pm at night)
5. very next day – Friday evening @ 6pm take it out from rerfrigerator and stretch again and rest for 1 hr. After 1 hr. cut and rest for 30min. and then bake
pls. pls. advice will this work ?
Thanks a bunch!
Hello lovely!your bread sure looks fantastic! Great holes you’ve achieved! I’m making my very own sourdough starter and it’s very much alive now. I’d love to use it to make this bread of yours. How much would I need to replace the poolish?
Nice post. I l?arn somet?ing totally new and challenging on we?sites I stumbleupon on a
daily basis. ?t will always b? exciting to read through articl?s from other authors ?nd
use a little something from other web s?tes.
Folderlock ?or PC Windows – ?on’t Spend Time Sea?ching, Study Information On Cellular Desktops
Here